Sunday, 30 September 2012

Shooting where no tripod may go

This is  what happens if you don't use a tripod: blurred images or worse, too much noise as the camera, set to Auto ISO cranks the sensitivity through the rook to 'get' the shot, no matter what.
Same view with the camera set to f8, ISO 100 and placed on the floor with the self-timer set for 2 seconds. Make sure no one trips over your camera while doing this!
Italy has some fabulous churches, palaces and museums. In many you can take pictures, which is great, because I really hate being told "no photo", even if I don't want to take a shot. For me it's a little like freedom of speech.
In the example of the fabulous Duomo in Siena, it's most likely to do with keeping the flow of visitors unencumbered by dawdling photographers - but occasionally it might also be to prevent ordinary people from cashing in on the postcard, poster and DVD market. As if anyone is going to do that.

I know tripods can be a nuisance in a church - the Duomo of Siena is a classic example. When I visited, the normally covered tiled floors had been uncovered. Apparently this happens for a few weeks a year so it felt that every man, and his dog, had turned up to check them out. It's impressive, as is the massive black-and-white architecture.
 

But, boy is it dark inside. So how can you get a clear shot? My technique (which of course, is totally covered by world copyright laws and must never be copied), is to pre-focus the lens on the ceiling, set it on a suitable depth of field (normally f8), choose the two or ten second self-timer and then carefully place the camera on the floor, press the shutter and walk away. Doing this allows you to get a good shot at ISO 100, with far less noise and clarity than everyone else. All those folk I see walking round the cathedral banging off picture after picture are going to be sorely disappointed...

Here's an example of pillar photography. Hold the camera carefully against a pillar, squeeze the shutter button and don't let go till the end of the exposure or the exposure bracket if shooting a sequence for HDR
You can also do a similar thing by holding the camera against a pillar although you are somewhat limited by the angles available. It usually works well.

If Plan A doesn't work because there's not enough floor space, go to Plan B and buy a calendar...

Saturday, 29 September 2012

Bar Centrale, Bevagna

It's been a hectic, history-filled, and totally enjoyable Grand Tour of Italy tour so far. With Sorrento, Paestum, Pompei, Herculaneum and Rome behind us we are taking stock and exploring the countryside of Umbria centered around the medieval town of Bevagna
Besides day trips to Spoleto and Montefalco the highlight for this leg was clearly the hill-top town of Assisi (HDR pano below). Amazing for its religious pilgrimages but especially so because of the beautiful frescoes painted by Giotto in the main cathedral. But, for a photographer this is a tough location simply because you are not allowed to shoot inside the church - OK, OK, the frescoes are hundreds of years old, but..

Here's a quick panorama of the town, shot using HDR of course, to add a bit of added detail to the sky. End of the day we retired to the Bar Centrale in downtown Bevagna for a drink and debriefing on what we have seen to date...


Thursday, 20 September 2012

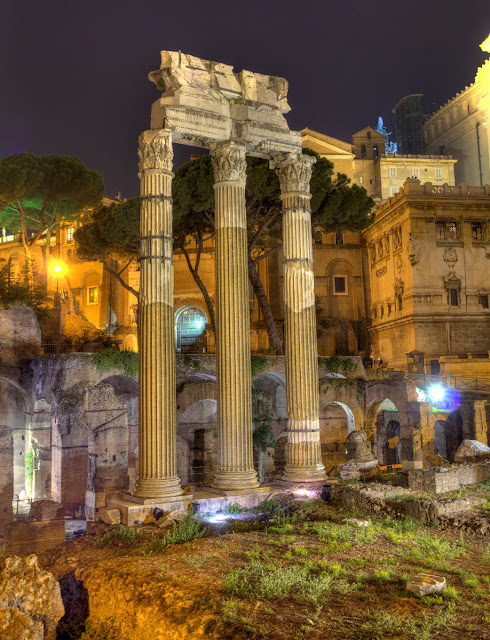
One night in Rome: HDR

My first night in Rome. A few HDR night shots just for fun. Tripod and a few very long exposures..
 

Thursday, 6 September 2012

New Eye-Fi Cards

I have just bought an 8Gb Eye-Fi SD card. This is a regular 8Gb card with an inbuilt WiFi capability. Once you have the card activated (via the Eye-Fi Site in a web browser) it automatically transfers images from the Eye-Fi card, to your computer. It works as fast as your home wireless setup works. 
It sells for around $108 (the model pictured). The Eye-Fi card I bought is an 8Gb, Class 6 read/write card with 802.11 wireless capabilities (whatever that means...).
What the Eye-Fi card does in reality is quite incredible. In the box you get an SD card, plus an SD card reader. Plug the reader into the computer, follow the install prompts and load the application. It takes a few minutes. When the app is fully loaded, you get a message onscreen to remove the card.
Place the card into the camera and, via the DSLR menu, turn the wireless functionality 'On'. (I use a Canon EOS D60 - in the Menu, choose the first yellow wrench icon and you'll see the Eye-Fi menu. Turn wireless on). You only see the menu if the card is in the camera...

Take a snap and the image is transferred to your PC/Mac. You automatically get an email notification from Eye-Fi that 'x' number of pictures have been transferred to your PC/Mac. You can either leave it at that, or, via www.eye-fi.com, manage your images using the online image browser to sort,name and distribute photos to locations like Facebook, Twitter, etc. Files are held for free for seven days, then deleted off the Eye-Fi server.


If you want to keep them online, Eye-Fi offers cloud image storage for $49/year - but I could not find out how much data $49 might buy you.

Eye-Fi also has a feature called Endless Memory. What this does is automatically delete images from the card once they are transferred so effectively, Yes, you can keep shooting because the card (theoretically) never fills up. A neat concept. 

There are three types of Eye-Fi card:
Connect X2 
  • Endless memory
  • Automatic photo & video upload
Mobile X2 
  • 8GB memory storage
  • Endless memory
  • Automatic photo & video upload
and Pro X2

  • Wireless RAW upload
  • Wi-Fi based geotagging
  • 8GB memory storage
  • Endless memory
  • Automatic photo & video upload
These sell for $58, $88 and $108 respectively (www.d-d-photographics.com)

Tuesday, 28 August 2012

Blurb and GST

Email received as part of Blurb's general awareness campaign

I have always thought that Blurb provides great service. This has been borne out several times when the product, a digital photo book, arrived at my door damaged, dinged or generally in a state that wasn't acceptable for the cost paid. Every time I complained (in the nicest possible way) and every time Blurb came through with a quick replacement. Great customer service.

However I recently had reason to get grumpy with the company. Since late last year I've noticed an extra charge appearing at the checkout. Just as you complete the order, a 10% GST charge appears. I was an a bit of a hurry the first time I saw this tax addition, but recently had the time to look into it some more. Even though I was ordering from what I took to be a US Site, and paying in US dollars, I still had to pay an additional 10%. I found this almost unbelievable since I was importing a book from overseas, and its value was less than $1000 I shouldn't have to pay GST right? Wrong.

If you live in Oz (or at least have an Aussie delivery address) you get to pay the tax, regardless of the total cost, or the currency

I wrote to Blurb's customer service asking what was happening. They replied that as they had an business interest in Australia, they were obliged to charge GST. I was not convinced. I had paid from a US account, in US dollars, for a book that arrived from California, via a US courier company (FedEx). I wrote more, demanding some answers but only got the same answer, this time in a slightly bigger point size. After a few more exchanges I called a local GST expert in Sydney. He confirmed that as the company had an Australian ABN it had to collect GST – the fact that it was being ordered from a US company, paid in US$ and delivered from California wasn't seen as relevant. GST has to be paid. I was pretty surprised at this. I've spoken to a lot of my photo students about this, most of whom order photo gear online from OS. No one pays GST on anything under $1000. But the problem is the ABN number.

Blurb did mention it had an Australian printer, but wouldn't divulge who this was. And since my month-long stream of grumpy emails started, I have noted several changes to the Blurb website, mostly pointing out a (new?) Australian Site, along with Sites for the UK and other countries. The latest was a global email informing me that as I had a delivery address in Australia I'd be paying GST – I don't think for a moment my emails sparked this off but then again, maybe they did? I've not heard of anyone else raising the issue.


To make matters worse I calculated that the total cost of my book was $30 more than the US$ price. Blurb's answer to this is that
it merely sets a price "... that the Australian market can bear...". 

Nothing to do with the exchange rate, which kinda sucks, because the rate works out to be what we were getting more than two years ago.
Ordering books from overseas, I was naively hoping to benefit from the strong Aussie dollar. In this case, apparently not!

I got over the annoyance of not being able to cash in on a
strong Aussie dollar. Nothing I can do about it anyway (other than find another bookmaking service). But that leaves the Aussie (‘au’) Site business. Who's to say where that 'au' Site really is? I've had a .com site for years and yet it's Australian owned and run. But it looks like it might be a U.S. site.

I'm not for a moment suggesting Blurb is dishonest, far from it - its customer service department was quite frank with all of my enquiries, but it highlights a GST Tax regulation that I think few Australians know about, or agree with. But, as I wrote to Blurb, that's a problem I have to take up with my own government not their company accountants.

Thursday, 26 July 2012

Boosting Your Macbook Pro RAM

As the physical size of computer RAM chips reduces and their capacity increases, we can pack more into the same space, making our computers faster and more efficient, especially when handling large files.
One of my bugbears has always been the [small] amount of RAM you can load into a laptop. Because of their obvious size limitations it's never been easy to add nearly as much RAM as it is to a [far larger] desktop computer.
I recently bought an Apple Macbook Pro (MacbookPro8.2 model) and, at the time of purchase, chose to add the maximum RAM possible: 8Gb, combined with the latest i7 QuadCore processor. It works very well. 

However one of my photo students was talking about upgrading beyond the stated Apple maximum using RAM bought from a non-Mac source.
Yes, you CAN add even MORE RAM to a MacbookPro if you buy not-recommended-by-Apple sort of RAM. For years I have incorrectly thought that if it was not sanctioned by Apple, it was possibly inferior or would make the device malfunction. But then, I have been using non-Epson ink cartridges for years with great results and have frequently added non-original parts to my car - and it still works.
The company I bought the RAM from was Other World Computers (OWC) in the States. I ordered on Monday, it arrived on Thursday. It took ten minutes to install. Easy. As I wanted it to go smoothly I also ordered the handy OWC tool kit - just so I did not try to open my shiny new Macbook Pro using a bodgy jeweller's screwdriver that I have in hte kitchen drawer.
You can also find simple, clear and no-fuss video tutorials on the OWC website that rate the trickiness of each operation for each model and go through the process with a blow-by-blow commentary (e.g. http://eshop.macsales.com/installvideos/macbookpro_15_unibody_early11/).

I used a US company because it was recommended, but I have since seen several Aussie companies advertising a similar service - albeit slightly more expensive. Try www.ramcity.com.au or maybe www.upgradeable.com.au

Note also that you can upgrade the internal storage (hard drives), in particular solid state drives (SSDs) to a far higher capacity that Apple currently offers. All these products are fully guaranteed so there seems to be no risk involved unless you are a total klutz with a screwdriver...

Wednesday, 18 July 2012

Cuba Photo Montage Book

I have just received my Cuba Montages book back from the printer - very happy with the quality, although to be truthful, over the past month I redid most of the pages many times, editing the colour and brightness again and again till I was happy. Someone remarked to me 'how long' it takes to make a digital photo book. This has taken me two months, on and off. If I have a folder of edited images it is possible to get it all done in a day, but then there's always something in the design, layout, colour, sharpenss and subject matter that can be improved upon.

For the first time I tried Blurb's ProLine Uncoated paper - in plain English this refers to a 'dead matte' finish. Great for a more 'arty' look and feel - but do beware, the more matte your paper surface, the flatter the tones reproduce so, to compensate, you might have to boost the colours slightly. As Blurb doesn't issue colour profiles for its pre-press you really have to do this by eye and hope for the best. Having said that though, if your screen is accurate (i.e. calibrated) then it's more likely to come out the way you want. It was also a good $25 cheaper - for the same thickness paper (as the more expensive ProLine Pearl).

You can buy the eBook here or check out the print version below:

Thursday, 5 July 2012

Photo-Real: a New Definition?

Here's a new 'take' on the description "photo realistic" - produced by Corridor Digital, a bunch of creative guys who make a lot of fun videos - mostly with ordinary DSLRs. Hope you enjoy it...

Saturday, 30 June 2012

Focus Stacking Technique

Focus stacking could change your life. Especially if you are trying to shoot a subject that just won't all get everything in the frame into sharp focus.

Why is this? All lenses have a focussing limit - either because their design prevents it from attaining truly deep focus characteristics (like a telephoto lens) or because, once stopped down to the smallest aperture (to get the benefit of depth of field) the image loses some clarity.
The answer to this sharpness dilemma is to make several shots of the same subject (obviously using a tripod) then assembling a 'master' image, deleting the out of focus bits from the three shots while retaining only the sharpest bits. The result? An image that looks like it was shot at f128! Another obvious advantage is that you can shoot the three sections using the lens' sweet spot - which is likely to be f11 - so you capture the frames at the sharpest possible aperture setting and only use the the 'good' bits from each frame. Easy to post process? With Elements, it's a no-brainer. With CS it's just a little more fiddly but I think you'll agree, the results are amazing...                                                                                                                                                                 


Tuesday, 19 June 2012

Destination: Broken Hill

Mine head by Glyn Patrick
Nine friends, including six lugging cameras and tripods, set out for Broken Hill in western NSW. It's a two day drive, with an overnight at Nyngan and stops in Cobar and Wilcannia. Arriving in time for ANZAC Day, the first 'assignment' was the dawn service, with following days seeing visits to the old mining town of Silverton, the Menindee Lakes and Kinchega National Park, and Mutawintji National Park. Broken Hill itself offers museums, old mine heads and shafts, galleries and parks - in short, lots of history and art. The Miners' Memorial stands against the skyline on top of the huge slag heap which dwarfs the city. As everyone knows, the past three years have provided unusually good rains, so the landscapes of this trip are not typical, but rather what counts for lush in the outback. After a week, the group dispersed to take different routes back to Sydney, one couple continuing on down the Darling River, another catching up with friends along the way. Robin's students, the photographers: Fay Burdon, Fraser Burdon, Carolyn Grattan, Lucie Loane, Glyn Patrick, Alan Stern.
Container train, Broken Hill by Glyn Patrick

Murray River reflections by Glyn Patrick

Open cut at Broken Hill, Lucie Loane

Sheep shearing shed HDR by Lucie Loane

Before the storm by Lucie Loane

River gums by Lucie Loane

Sculpture with magpie. Pic by Lucie Loane

Shearing shed by Fay Burdon

Mining gear by Fraser Burdon

Old rail tracks, Broken Hill by Fay Burdon.

Minehead by Fraser Burdon

Digger on parade, Alan Stern

Hubcup Lake sunset, Alan Stern

Kinchega woolshed by Alan Stern

Miner's memorial, Carolyn Grattan
Mutawintji National Park. Carolyn Grattan.

Nyngan Sunset. Alan Stern

On the road to Silverton. Fay Burdon.

Young Aboriginal soldier, Fraser Burdon

Silverton Memorial. Pic by Carolyn Grattan.

Silverton Window. Pic by Alan Stern.

Silverton car. Pic by Carolyn Grattan.

Miner - pic by Fraser Burdon

Friday, 1 June 2012

Using a Custom Profile for best DSLR Video Results

One of the oddities involved in shooting video with a DSLR is that there's no obvious RAW file format. For this reason, shooting using a default mode creates all sorts of contrast and dynamic range problems - highlights blow out and noise plagues the shadows.

For the best results you can load a special colour profile that drops the contrast, sharpness and colour values captured in the raw clip dramatically. This profile produces what initially appears to be a fairly useless looking result - the contrast is dead flat and colour almost non-existent. BUT, it gives you nearly two added stops in dynamic range, and because of this, there's less need to crank the ISO values through the roof. And less need to worry unduly about contrast (although this is always relevant when shooting video).

Where do I get one of these special profiles? From the Technicolor website.
http://www.technicolor.com/en/hi/theatrical/visual-post-production/digital-printer-lights/cinestyle

So this is what the Cinestyle profile looks link once loaded into the Canon's firmware. You can have up to three different shooting styles should you wish. You can also reduce the sharpness, colour and contrast in the settings - as seen here, to give an even flatter looking tonal response. This then requires the addition of an S-Curve in post-production to add contrast and brightness to bring the visuals back into line with what we want from the image file.


Although this is not a true RAW file for video, it's close to it. Cinestyle is a colour profile designed specifically for Canon DSLR cameras. To use this profile, first download off the Site then follow the instructions. This has to be copied onto a memory card and uploaded into the DSLR - once done it appears in one of the free User Defined Picture Style slots (Canon DSLRs have three spare slots). From this point you can further adjust the contrast and sharpness and colour settings to produce a truly flat looking result.

This is then edited in the normal way using any of the video editing applications on the market. I use Adobe Premiere Pro because it does everything. The clips have to be graded (a video term meaning editing). You can use tools such as Curves to add a slight S-curve back into the clip to boost the highlights and shadows. Doing this turns your not-so-interesting-looking clips to something a lot more visual.


Tuesday, 8 May 2012

Book Design Ideas

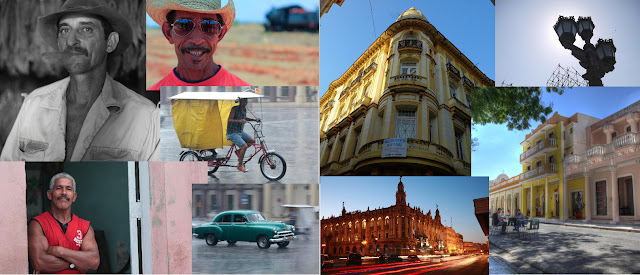
Everyone is getting into making digital photo books. But, if you take a look at what's been done (see www.blurb.com and navigate to its bookstore) you'll appreciate that most of it is of a very uninspiring nature. No Photoshopping, no clear editing skills and poor design values. Here are some suggestions for your next book project.
FREEHAND SCRAPBOOK style
I don't think this works because there are too many images, too close together and this makes it hard to identify where one image stops and the other starts. A bit too 'messy' for my liking.
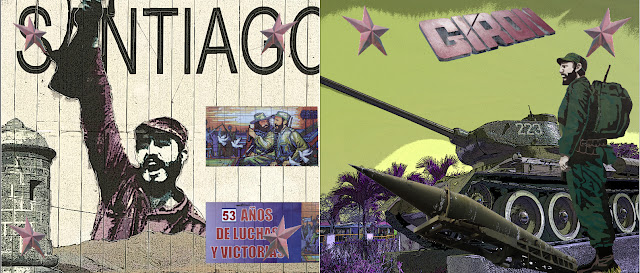
PHOTOSHOP SCRAPBOOK STYLE
This works far more effectively because everything has been selected and cut out of the background to create this scrapbook look. On top of that, most of the images have had heavy filter EFX added to them. Doing this needs considerable time and Photoshop skills to complete.
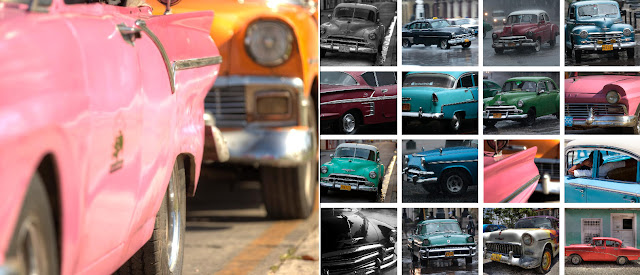
THE STANLEY GIBBONS STAMP ALBUM LOOK
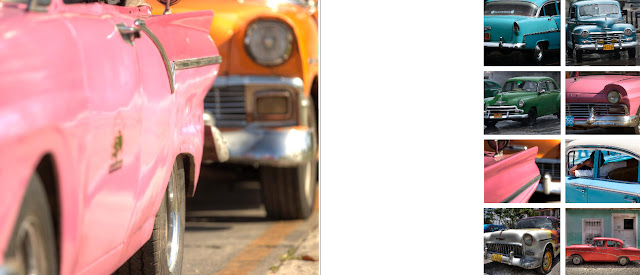
Always have a 'hero' shot on one page, then add smaller feature images to the other side to compliment the hero shot. That said, this is still a busy page! Many beginners pack their pages with 10, 15 or even 20 photos. Way too many - the book begins to look like a stamp album.
CREATE A HERO PAGE
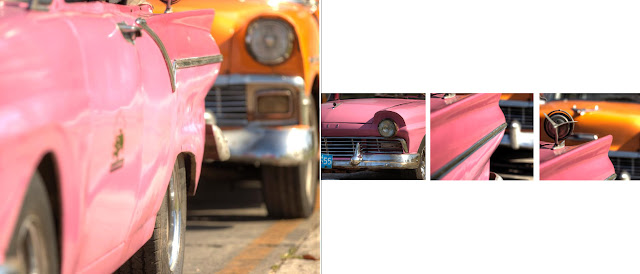
This is a better version of the page layout above. Isolate your 'hero' shot, find images that are bold, strong in colour (or black and white tones) and don't be afraid to use them BIG. I have created more white space by removing 50% of the images off the right-hand page. This creates a cleaner look to the layout.
SIMPLIFY YOUR DESIGN
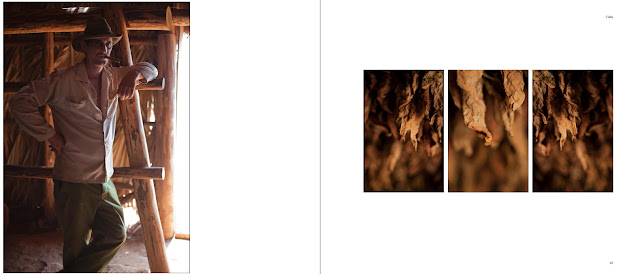
Another take on the same page - using a nine frame template - but only filling the middle three spaces to create this white space.
LESS IS MORE
Here's another take on the hero shot - with complimentary images echoing the topic on the opposite page. Note lots of white space.
DON'T DO THIS!
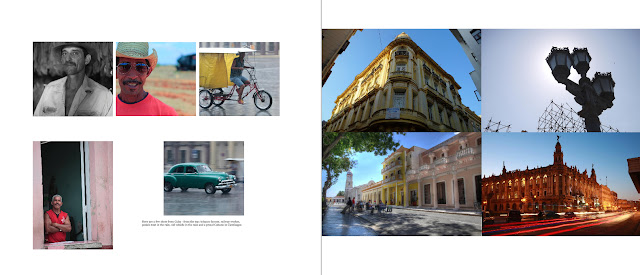
Easy to fall into this trap, adding images and image boxes at random. The result? A dog's dinner design that has no clear purpose and relation to the other images or captions on the page. For best results, simplify your design!
KEEP it SIMPLE
Don't fall into the trap of adding more and more images to each page. In fact, you could remove 50% of all pictures and create a far cleaner-looking design

BIG is BEAUTIFUL
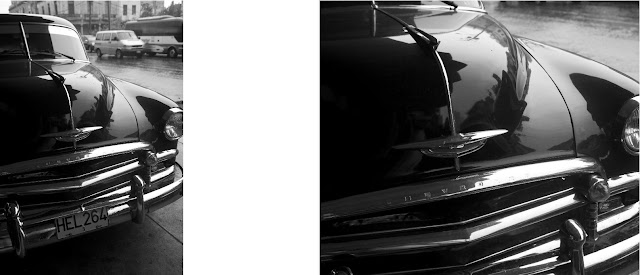
This DPS uses the same image twice at different positions and at different enlargements. Quite an effective technique for when you have a hot shot that you want to profile.

BIG is BEAUTIFUL 2
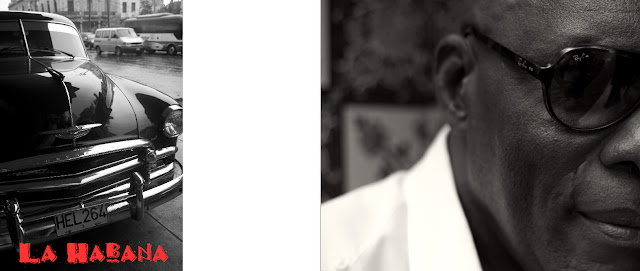
Big images, in this case I enlarged the images files to 200% to get this effect. Never be afraid to make the image go far larger than you think it should. Fill the page, add extra pixels if you get the yellow [resolution] warning from Blurb (adding more pixels is easy using Elements). I used a specialist FONT here (downloaded off the Internet at www.dafont.com to give the page more of a Cuban flavour.
BIG is BEAUTIFUL 3
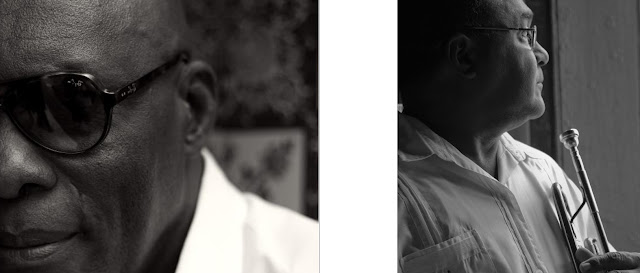
Flip the page and I have the same shot, but flipped, on the left-hand side for impact with another black-and-white muso shot to echo the mood on the RH page
The DPS or TWO PAGE SPREAD
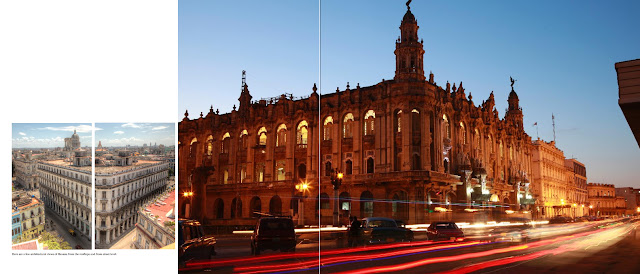
For me this is the perfect DPS (double page spread), stretching the image across two pages (you have to drag it into both pages, enlarge proportionally (usually 150%+) and push the LH image to the right and the RH image all the way to the left to get the two images to line up.
Guaranteed WOW factor