Friday 22 January 2010

Photo Walk through Sugar Dock

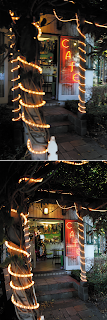
Jan 21st was a hot, hot day. Probably not the best sort of day to go on a 5km walk through the concrete byways of the city,. But walk we did and all 12 of us had a great time. In fact I think if you can do this kind of walk, with a camera and still come back with a couple of good, strong images, you can do it anywhere.

That's a bit of an assault course mentality but I think doing this can stand you in good stead, providing you don't get too much sun. I suggested we shoot bracketed exposures as much as possible. Firstly, to help combat the extreme contrast experienced on a day that's 30 degrees in the shade.
And secondly with a mind to use all three/four/five/seven bracketed shots in an HDR image at some later date.

HDR? High Dynamic Range image.
This is really a 'super tone' image in that, using specific software, allows you to take all the 'good' bits from the three bracketed shots and assemble them into one super tone image that has a much wider range of tones in it that you could possibly capture with the one shot.
The reason this is necessary is that our cameras cannot capture a wider dynamic range than about 5-7 f-stops (depending on who you talk to).


(Here's MB with a new camera-steadying technique)


A general scene shot on an extremely bright, sunny day is likely to have a dynamic range of 10-12 steps (that's ranging from extreme white highlights to dark shade). This nicely explains why some of your landscapes have great skies but lousy dark landmasses in them. Why interior shots often have white, blown-out detail in windows and why family groups always look so bad if the people are standing in dappled light.

The best software for assembling and manipulating HDR images is called Photomatix Pro and is available as a free demo from www.hdrsoft.com - it only costs US$99 so, if you like what you see, I think it's well worth buying - if you don't the trial version puts a PHOTOMATIX watermark through each picture! Photoshop CS2/3/4 also does the HDR merging but, in my opinion, the results area not quite as spectacular.
You can also use Elements (any version) you can also assemble a credible HDR effect - although as you'll see from the PDF I'll send to all that took part in the walk, it's not that easy to do. It's a complex and involved 'workaround'. Good news is that in version 8.0 you'll find a NEW feature called Photomerge Exposure (under the File>New>Photomerge menu) which does an OK job of either automatically or manually making the effect. Again, I don't think it is a patch on Photomatix Pro but, if you have Elements 8.0, give it a go. See my pathetically small video on this page for some assistance...

We also had some fun shooting the evening light as it faded opposite the city at the end of the walk - some using Polarising filters of ND filters to deliberately slow the shutter speed to excessively long times so as to create a smoother and more glass-like appearence to the slightly choppy harbour waters.

Friday 15 January 2010

Photo Walks


These local photo tours are designed for anyone wanting to refine their photo-taking skills in a number of subject areas. Or you might just want to come along for a fun and informative afternoon shooting with like-minded photo enthusiasts. Subjects covered on these shoots include:

Night/evening photography (Darling Harbour, Anzac Bridge and the piers)

HDR Picture-making (City + Cockatoo Island)

Long lens photography (Taronga Zoo)

Architectural+ photography (around Sydney’s wharves)

Basic portraiture techniques

Macro photography techniques

Cost $85 per person for 6-7 hours. (Price includes a critique of your work on Robin’s web Flickr site). Note these classes are open to all with a D-SLR camera and a basic understanding of how it works. Robin’s informative, patient and knowledgeable teaching style ensures that even novices are up to speed and shooting with confidence...
To check on the next available photo tour, call Robin on 02 9389 2465 or email betterdigitalmag@gmail.com

Wednesday 13 January 2010

Combining Multiple Exposures

If you are working on lighting a landscape (as in a previous example) you are unlikely to get totally even illumination unless you plan it meticulously and use a laptop on location to check the results as they happen - but it is part of the magic and excitement of messing with added lights while in the field. It's also part of the frustration!

In this exercise we did several different 'takes'. All were quite different so I decided to add the four best exposures into one 'master' Photoshop document. The idea is to leave a dark base image as the bottom or background layer than add other layers above that making sure that each has different lighting - this means that when it comes to erasing the dull parts on layer two, for example, what remains is better exposed than the material on the layer directly beneath it.


Do this erasing action for all the layers, removing all the dull or over dark pixels so you should end up with one super exposure made from a number of good bits from four frames (or more).


Tuesday 12 January 2010

Tips for Sharper Shotz (4)

Regardez les AF points

One highly useful feature you’ll find buried away in the menus of some of the better D-SLRs is to have the AF points displayed on the frame that’s just been shot. You can then display the image on the camera LCD and see immediately if it focused in the right place, or not. I use this a lot and find it very effective, especially if shooting on the run and when I don’t have a lot of time for introspective LCD inspections.


Run out of light? raise the (ISO) sensitivity
It sounds like a miracle. If there’s not enough light, if you can’t open the lens aperture any more than it already is and you don’t want a slower shutter because there’s no tripod, you can pretend to the camera that there’s more light than there really is by increasing the sensitivity of the sensor. This in turn allows the camera to choose a faster shutter speed, preventing camera shake and saving the day. The big downside of this is that the picture often suffers excessive graininess, a feature called digital noise. The smaller the image sensor, the more acute this is likely to become at high ISO numbers. The newer the technology however, the less disturbing it is because the software that processes it is so good. Here’s a great example taken using the Canon EOS 5 MkII at ISO 100 (blurred) and then at ISO3200 (not blurred!)


Auto focus, or manual?


One of the best technologies to hit the stores in recent years is called variable AF points.
Traditionally we focused a picture by placing the centre AF spot (in the viewfinder) over the subject and rotating the lens barrel till it became sharp in the eyepiece. Once auto focus (AF) modes hit the stores a few years back this process became automatic and much faster.
With each new technological development the process of focusing just got quicker and more accurate. Then we got multiple AF points. In this case the camera’s ‘brain’ or CPU (Oh! my God, it’s got a brain?) takes a reading from several AF points in the viewfinder and averages the results out to (hopefully) give more reliable focussing information. We are now up to nine, or more, different AF points (some of which are called Assist Points designed to make low light response less fretful). In most examples these AF points can be shifted manually so that you can move emphasis to only the left-hand part of the viewfinder if shooting a racing event, for example. Or it can be locked off to the bottom part of the viewfinder for landscape shooting. It’s a great feature but, if you are none the wiser about how it all works, it can also work against you.

I’ve lost count of the times I’ve been asked to “fix the AF points”. The centre AF setting comes unstuck (usually because the Lock lever is shifted to ‘Off’ by mistake). I was at a Sumo competition in Hakata last year and was approached by a Westerner asking if I knew how to fix his camera - the AF points on his Nikon had been unlocked and shifted over to the far right-hand side of the frame making it very difficult to get the correct focus - especially when the contestants moved to the right-hand part of the ring! If set wrong, the result will more than likely be out of focus. It’s also annoying if you are trying to control the depth of field effects when using low aperture numbers (like f1.4) and your AF persistently locks onto the wrong part of the subject. My solution is to lock the AF point to work in the centre of the frame only and to then go manual. Turn the AF off and manually focus the lens. This is slower, but it’s more accurate.


Sumo shots: This is what Canon EOS AF points look like - there are nine, but currently it’s locked onto the right-hand AF point only. Wrong place in the screen so the subject won’t be correctly focused. I’d miss the shot. In its Auto mode, it’s more likely to lock onto the subject (at left), or you could manually focus or move the AF point to the left hand side of the viewfinder to ensure the bits you want to get sharp, are focused and therefore sharp.

Another thought is that different lens focal lengths give quite different focus effects. For example, we typically use wide-angle lenses to ‘get everything in’. They are favoured by architectural and landscape shooters, in fact, anyone needing to pack a lot of data into the scene. One of the attractive features about a wide-angle lens is that you really don’t need to think about focusing too much. Its chief characteristic is that, even with a modest aperture number (i.e. f8), its depth of field is good. So you don’t need to try hard to get everything sharp in the frame, from the front to the back. Conversely, the more powerful the telephoto lens, the less depth of field you get. This too is a very good characteristic, as long as you are aware of it at the time of shooting. We use telephoto lenses at wide open apertures (f2.8) to make everything behind, and in front of the subject go completely out of focus, so the subject is isolated. It’s a powerful, creative photo technique.

Friday 8 January 2010

DSLR Handbook

This is a self-published handbook on getting the best from your D-SLR. It's not model-specific for the simple reason that camera functions are essentially the same. More importantly it provides an overview on key D-SLR features, how to set up a shooting workflow; how to sort and make initial edits, how to calibrate your system for a consistent colour workflow, how 'read' the LCD, plus composition pointers, the essentials to making a good picture, controlling depth of field, shutter speed and ISO sensitivity.

As a photography teacher I've drawn on many years of seeing beginners make the same mistakes over and over again. The examples in the latter part of this book highlight the sort of visual mishaps we frequently encounter. Each situation has a clearly-illustrated solution, and this has the sole purpose of putting the control back into the photographer's hands so they record what they see with much greater confidence...


10x8 inches, 120 pages, full colour, US$37.95 - shipping extra, please see www.blurb.com for precise shipping details for your region...

HDR Handbook

This is a practical handbook designed to give beginners a complete overview on the high dynamic range (HDR) picture making process.

HDR enables us to record more detail and more tone in a processed digital image than we could possibly do using one straight shot. This 80-page book comes packed with great 'how-to' information drawn on years of practical and teaching experience.

'Basic HDR' covers the absolute basics plus a range of more advanced shooting and processing techniques. These include troubleshooting and post-processing strategies using (predominantly) Photomatix Pro, but also Photoshop and Photoshop Elements. Written in plain, clear English, this is the perfect introduction to a technique that's considered something of a 'rising star' in photographic circles...

10x8 inches, 80 pages

US$32.95 - shipping extra, please see www.blurb.com for precise shipping details for your region...

Thursday 7 January 2010

Learn Photography at CCE

I teach several courses at Sydney's Centre for Continuing Education in Newtown and now (2010) at the Sydney College of Art (SCA) on its Rozelle campus. Classes include:

Basic Introduction to Digital Photography
A one day introductory class covering everything from basic camera functions and features, downloading to the computer and simple software enhancement techniques.
Full day

Digital Photography, the Next Step (on three consecutive days)
A natural follow-on to the one-day class (although by no means is it a pre-requisite), this Newtown-based course teaches students the basics of camera craft, including the use of aperture, shutter speed, ISO, White Balance and more. You will also learn how to manage your digital picture output, how to load image files onto a computer and how to enhance the work done. We also look at how to create effects like panoramas, cards, collages, photo books and more.
Three full days

The Art of Digital Photo Book Making
The flavour of the moment, digital picture books are awesome, professional-looking coffee table style products. In this three-day computer lab-based course we run through the process of making one of these beautiful publications. Including tips and tricks for working round the limitations of a template based mass media software tool.
While more than half the time is spent on book design, text and image enhancement, we also cover how to create greeting cards, collages, multi-image posters and more.
Three full days.

Digital Photography, the Next Step
Designed as a follow-on to the one day class. Open to all comers but preferably those with some prior experience with cameras and computers. This is ideally suited to anyone that can't escape their real job in the daytime. We spend the first night looking at slide shows, examples of camera technique and run over the features of everyone's camera.
Then we spend two nights on location somewhere in the city, two nights in the computer lab working on our images and the final night at a photo lab printing the results of our labours.
Six, three-hour sessions.

Making the Most of Your D-SLR
A natural progression from our three-day or six-night 'Next Step' class. Designed for owners of a D-SLR or an advanced P.A.S.M. compact cameras that have adjustable aperture and shutter speeds. WE start with a two-hour orientation meeting where I go over intermediate and advanced camera functions and features. We then meet a week later at a location in the city (usually Darling Harbour or Cockatoo Island, or similar) and spend the whole day shooting in a range of different lighting and subject matter.
Day two involves a short model shoot in the morning giving us the chance to practice shooting people with flash and in natural light. The afternoon is spent assessing the work done in a series of critiques and discussions.
Two hour orientation, full day field trip , half a day on location in Newtown area then half a day in the computer lab.

Basic Composition: Adding the WOW factor to your image-making
This class is designed for everyone wanting to get an idea of how to make a picture more interesting. We spend a couple of hours looking at compositional techniques and then spend the days on location putting this into practice. There is not restriction on the type of camera used but clearly a P.A.S.M. camera would give you a great advantage in terms of creativity and control.
Students are given assignments for the field trip and the best results are then assembled into a slide show for a final three-hour critique night.
Two hour orientation session, full day field trip, three hour critique session.

An introduction to HDR image making
High Dynamic Range image making is all about shooting multiple exposures of the same subject then assembling them into one dynamic looking image with a massive range of tones. It is a great technique and produces some truly amazing visual effects. Day one involves a field trip and day two sees us in the computer lab assembling our fieldwork.
Two full days

Portraits Unplugged
In this two-day class we spend a lot of time shooting models in a number of different locations. Indoors and out, in natural light and using flash, with speed lights and reflectors. It's designed to be a confidence booster for the beginner photographer. The assignments give everyone an insight into dealing with new gear and techniques for dealing with people.
Two full days

Tips for Sharper Shotz (2)

Aperture as a creative tool
Cameras, point-and-shoot or D-SLRs, come with full auto focus (AF) capabilities. This means that, in theory at least, we just need to be able to point the thing in the direction of the subject and the camera meters (regulates) the light passing into the camera and it automatically focusses on the subject too. Unlike the shutter though, the aperture also affects how much ‘stuff’ appears sharp around the bit that the lens initially focused on. Wer'e all familiar with depth of field focussing effects. Every Donna Hay cookbook has illustrations shot using a wide open aperture, not because the photographer needed to get more light but because a side effect of using a small number, or wide open aperture, is that only the bit focused on actually comes out sharp. It’s a great effect that works well for many subjects (see illustration here). To get more stuff clear in the same frame, the photographer has to choose a big number f-stop (that has a correspondingly small aperture number) however, this's not always good because, if the aperture is made smaller, you need a correspondingly brighter light source, or a slower shutter speed to collect the same amount of light into the frame as before. Here’s where problems occur. A longer shutter speed means slower exposures which, you guessed it, means camera shake.

Telephoto lenses produce markedly shallow depths of field, especially once zoomed in to full magnification. This can work for, or against the photographer, depending on how you interpret the results. Here I focused in the centre of the viewfinder and, at a magnification of 200mm, only got a small fraction of the frame sharp. It’s important to note that this is not so much out of focus or blurred, it’s selectively focused.

Understand light metering
All cameras have a light meters. Some store memories of thousands of ‘typical’ photos so the current scene can be evaluated against its memory bank in the hope that the perfect exposure is the result. Sometimes this happens, sometimes not. I don’t care what the camera designers and tech geeks claim this new technology can do, inconsistencies will always occur simply because of the variables involved. Give ten photographers, ten similar cameras and similar subject matter, and you’ll get ten different results.
Once you understand how a meter works, you’ll be able to control the results much better. The important bit is to appreciate is that the meter’s job is to average out the light to a point somewhere in between light and dark. Typically, a white wall will be metered as grey. A black predominently dark subject will be metered as grey. This happens because light and dark is averaged to get a more consistent result. Compounding this is the way that the meter prioritises its (shutter and aperture setting) decisions. All cameras prioritise shutter speed over aperture, up to relatively fast speeds of 1/125s, or more. Use a Photo Browser and look at a bunch of your shots. I can guarantee that, reading off the Metadata for each, you’ll see most have been shot at the maximum aperture unless the scene was shot in very bright light. This is because the programmers want the fastest shutter speed, to prevent camera shake. This also explains why sometimes stuff appears to be soft in the shot, especially if it’s located physically close to the point where the lens initially focused. Because it’s chosen a big aperture, the depth of field is small, therefore stuff looks fuzzy. The photo isn’t necessarily out of focus, it’s just the bits that fall outside of the depth of field are not clear. Change the exposure mode from Auto to Aperture. This enables you to dial-in an f-stop of your choice. Great for controlling depth of field, something that’s needed by advertising, landscape and architectural photographers. So, if you override the light meter by forcing it to set f22 instead of f2.8, the shutter speed increases by six steps. Thus an original exposure of 1/60s turns into one, or two seconds. Impossible to hand hold and still guaranteed to produce inferior results unless a tripod is used (cont'd).

Tips for Sharper Shotz (3)


Fast aperture lenses also help sharpness!
Spend your money on a good lens and you’ll see significant improvements in picture sharpness. I’ve used kit lenses for a number of years and was never really 100% pleased with the sharpness. Most are OK, and a few, like those from Sony and Olympus, are actually good considering the price. But if you want the best in terms of build quality, resolving power and photo sharpness, you need to get a pro quality lens produced by a major camera or independent lens manufacturer. Certainly these are considerably more expensive than kit lenses, but the jump in quality is significantly better. I guess it all comes down to how much you value your hobby. Using a fast, expensive lens is not going to make you a better photographer, but it’s going to open up your creative options significantly. And that’s always worth paying for.
Nikon, Canon and the other major lens manufacturers produce pro level optics that usually incorporate special low distortion glass elements, moisture and dirt proofing (using O-rings) and superb build quality. These inevitably come with fast f2.8 (or higher) maximum apertures, so can be used, hand-held, in low light, yet still produce sharp results. Some of those for Canon and Nikon also come with inbuilt image stabilisation. Cameras made by Sony, Olympus and Pentax have image stabilisation built into the camera body thus all their lenses are stabilised.

All-in-one lenses can be tricky...


To add insult to this technical problem, many newcomers get talked into buying the ubiquitous one-lens-does-all zoom. While these certainly are the answer to all our lens-changing fears, there’s always a downside. Because so much subject magnification is packed into the one lens (and cost has to remain affordable) it must have a variable maximum aperture which is never high, especially once zoomed to its maximum magnification. A typical example might be an 18-250mm zoom with a variable maximum aperture of f3.5 (at the 18mm focal length) to f6.3 at its maximum 250mm magnification. In most lighting this means you have to shoot at ISO 800, or higher to get a sharp shot, or use a tripod, which few like to do. Companies like Tamron and Sigma realise that this is an issue (the inability to let enough light into the camera to maintain a safe shutter speed) so are now adding image stabilised versions for its all-in-one lenses. Excellent idea! This technology is brilliant and helps produce a sharper, clearer result. While having image stabilisation is an affordable bonus, having a lens with a fast and continuous maximum aperture is the ideal option. A fast maximum aperture enables the meter to use faster-than-standard shutter speeds (hence the term, ‘fast’). A fast aperture also gives the photographer more creative depth of field options. The chart shows the limited options offered by a typical f3.5-6.3 18-250mm lens when zoomed in to its maximum magnification. Because at this magnification, f6.3 is the widest aperture, in certain average lighting, you only get a couple of options for pin-sharp results (in green). The other exposures still give a bright result, but they won’t be sharp unless a cable release and tripod are used.

By using a slow shutter speed and moving at the same speed as these commuters on an escalator, figures appear a lot clearer than if I’d stood still and snapped as they moved past. This is a type of panning used to create a sense of movement without losing all the subject detail.


Night shooting - you need support, no question

The answer is as old as photography itself. Use a tripod. Of course professionals don’t have a problem using tripods because they understand the need for stability, most enthusiasts don’t or are too lazy. I hear loads of excuses about why they don’t need a tripod. “I have image stabilisation”, “I can hand hold anything”, “...a tripod is too heavy”, that sort of thing. All valid maybe, but it matters not. If the shutter speed is a number that’s smaller than the focal length of your lens, you need to use a tripod. In English, this means that if you are taking snaps in a Moroccan marketplace using a 75-300mm zoom lens (and a shutter speed of 1/60s), your shots will be blurred. If you bump the ISO from 100 to 1600, you will get sharper shots, but you’ll also get increased digital noise. If it’s an image stabilised lens, use it because you’ll get much sharper shots, even at lower ISO sensitivity settings.
Telephoto lenses especially need to be operated with a fast shutter speed because they magnify not only the subject matter, but your camera shake as well. We all know how hard it is to hold powerful binoculars steady, so why is it any different for an eight times magnification tele lens? It’s not, so care has to be taken.
We are now seeing new point-and-shoot models with 10X, 12X, 15X and even 20X zoom lenses. Twenty years ago this would have looked silly. Mums and dads walking round with a lens that weighted more than two kilograms and extended way past their knees. Great to have this packed into a tiny 400g camera, but the shake issues remain. In many ways, the inclusion of 400mm+ telephoto lenses in tiny cameras is driving the development of image stabilisation - And this is a great thing for the industry, and our results. However, it sure helps, it doesn’t remove shake entirely.


The more you zoom, the faster the shutter must be
...
As old as photography itself, you need to match your lens focal length with the shutter speed used. So, back to my shooting example. Let’s say the light is fading and, at ISO 100, the camera is allowing me to shoot at 1/60s with a wide open aperture of f4. The lens is an all-in-one 18-200mm, so I know that shots taken at the wide angle end of the scale (18-35mm) will more than likely be sharp. But once I zoom in using a focal length that extends beyond the 35mm setting, my safe 1/60s shutter speed is not fast enough to reduce the resulting camera shake. Because the aperture is already opened to the maximum (remember that’s how programmers like to work the metering) my only option is to increase the ISO.
Increasing the ISO is like pretending that there’s actually more light that there really is. It’s a great option but you must be careful here. Some cameras get very noisy when the ISO is pushed over 400, especially point-and-shoot cameras (that have small sensors). The higher the ISO setting, the spottier/noisier the results. This is normally OK if you are only printing small, but can be trying if you plan on adding the results to a full page in a digital book, for example.

Wednesday 6 January 2010

Tips for Sharper Shotz (1)

What’s apparent from pictures submitted for publication is that many photographers can’t get shots sharp. A surprisingly large percentage are just not up to the task. With technology getting better by the day, why aren’t pictures razor sharp? Here I look at the root causes of unsharp shots and suggest some basic remedies to make your photos as sharp as a tack. Most pictures exist either as a monument to the skills of the photographer or they appear as something less than special. Aside from poor composition, what usually lets the shot down is a lack of image sharpness. The reasons for not getting photos pin-sharp are both technical and creative. Many photographers add a blur or subject motion to a shot for creative reasons - and this is most effective, but it's not hard to spot pictures that are just plain unsharp through lack of technical skill or ignorance.

Not focused, or just blurred?
If the shot has a slight double image, then it’s blurred. This means that the subject has moved between the shot starting and finishing, which is why it shows double. If you are not a steady person, you’ll often see multiple fuzzy images where clearly there should only be one. More than likely a photo like this is actually focused, it’s just that your movement has weakened the apparent sharpness of the focused image.


If the photo is fuzzy all over (like the padlock in this example, click to enlarge) it’s plain out of focus. This is usually caused by the camera’s auto focus mechanism not latching on to the subject correctly. Either because the subject is moving too fast, there’s insufficient light (like the human eye, cameras need light so they can 'see' to focus) or because the technology is not up to the job.
This happens frequently despite the amazing technology at our fingertips. Now I’ve said this before, but I’ll repeat myself again, ‘just because technology is improving, it doesn’t mean we can stop thinking...’.
Marketing departments still apply the Kodak credo from decades ago: “...You take the pictures and we’ll do the rest...”. Providing that the shooting conditions are good, you should get acceptable results. But if the subject is moving too fast, is too far away, is insufficiently lit, or is masked by things like telephone lines, wires, vertical blinds, glass or even heat haze, things may not be as sharp as the brochures promised.

Minimum shutter speeds for sharp shots
Super wide-angle lenses (interiors): 1/25s
Wide-angle lenses (interiors, landscapes, people): 1/60s
35-75mm (standard portrait focal length settings): 1/125s
Medium telephoto lens: 1/250s+
Long telephoto lens setting (200mm+): 1/500s+
Minimum speeds for image stabilised lenses
Super wide-angle lenses (interiors): 1/4s
Wide-angle lenses (interiors, landscapes, people): 1/8s
35-75mm (standard portrait focal length settings): 1/15s
Medium telephoto lens: 1/30s
Long telephoto lens setting: 1/60s

Sharpness is controlled by shutter speed


The photographic bit that makes a shot sharp is the shutter. This is like a door. It opens to start the picture-making exposure bit and closes once sufficient light has got into the camera to make a nice, bright shot. Unfortunately what tends to ruin the result is that, in-between the start and the finish of this process, the subject, you, the lens, or all three might move, so you get a blurred result.
OK, the easy answer is to make the shutter go quicker so no blurring occurs, right? Good idea, but remember that you need light to make a shot. If the shutter fires too quickly (most D-SLR cameras can go as fast as 1/4000s), not enough light gets onto the sensor to make the shot and the photo comes out dark.

Subject clarity is also controlled by depth of field
So, the speed of the shutter regulates light passing into the camera, and it also influences sharpness. What else helps make the photo ‘come out’? It’s the aperture or f-number.
The aperture is that bit in the lens that opens and closes just like the iris in your eye. Like the shutter, this aperture action controls the amount of light that reaches the digital sensor, thus it a significant impact on whether the resulting photo is light enough, or too dark. Aside from letting more or less light travel into the camera, different apertures create different depths of field. In layman’s English this means that the larger your aperture number (a smaller physical hole in the iris), the more 'stuff' you get sharp around the bit that the lens has focused on. It’s hard to put into words.

Much better to see it illustrated (cont'd).


Combining Multiple Exposures (2)

Another object I tried a multi-flash exposure technique with was an old lathe in Cockatoo Island. Basically the lighting is crap in the workshop where the lathe is sitting so, providing you can lock the camera off on a tripod and set the aperture to a medium number (i.e. f5.6 or f8) and still get a long enough shutter speed to allow you to manually bang off a couple of flashes, freehand, you can make this technique work on anything. Note I say 'freehand'. The idea being that if the shutter speed is long enough, and you are paying attention, you can set the speedlight to Manual output and stand away from the camera and fire the flash into the subject at an acute angle to add drama.

For this to work I'd need a shutter speed of 1/8s, or thereabouts. This gives enough time to set the self-timer, move into position and have enough lag to press the speedlight's test fire button. In darker locations you need a longer shutter speed and then it becomes easier to pop in multiple flashes. Note I also said "choose f5.6 or 8". This is because this seems to be the ideal aperture for your speedlight. Any smaller (i.e. f16) and you'd have to thump out so much light, the effect might not be noticeable on the subject o r the capacitors would be so drained you would have to wait a minute for it to recharge.

So, set yourself up, use a good tripod,

Sparkler Man

As they say: don't try this at home unless there's an adult present!
Thanks to my friend Alex Cowley for this one. Here he's standing in an almost totally dark room with two handfuls of kid's sparklers. The sort you can buy from a newsagent.

Camera: Canon EOS 5D MkII
Aperture: f6.3
Shutter Speed: 36 secs
ISO: 100


The trick here, as I learned from Alex, is to rotate your arms in a circular motion very slowly which turning 360 degrees on the spot. It takes some doing but this is the sort of result you can get.
Troubleshooting:
- If the room is not dark enough, the ambient light int he room gets recorded and the shot becomes to light and the EFX is almost unnoticeable
- Keep the ISO at a minimum otherwise the noise becomes nasty

Great Torch for Light Painting

One of the best torches I have ever seen, or used, is the LED Lenser - this is German technology at its best (LED Lenser Optoelectronics) and as far as I can see far surpasses the performance of rivals like MAGLITE torches (for US readers, please supplant the torch with flash light!).


LED or light emmitting diode technology is not new, but it's only just now released in the form of some very cool devices.
LED lamps consume very little power and are incredibly bright so you need to be quite careful not to produce hot spots in your 'painting' exercises. THe other big feature od the LED Lenser torches is that most have a speed focus - slide the lemp head forward or back to make a pinpoint light effect.
They are NOT cheap but they are quality. Recommended.

http://www.ledlenser.com.au/2009/index.html - for a range and list of stockists...

Distorting with Displacement Maps

The texture shows through really well using this Blend Mode overlay technique but you can take this further if you want. What we have here are two things: a textured overlay, as described, plus a significant image distortion. As you well know, digital pictures are rectilinear. EVERY picture is the same so sometimes it's nice to mess with that perfection, adding a distortion to a layer or, as was also the case here, to a rasterised text layer.

To do this I use Photoshop's filter (Filter>Distort>Displacement). This works on a selected image, applying certain elements from that file to the distortion. It's hard to explain how it physically works, but it can produce significant distortion on the selected area. Note I said "selected" area. If I just chose the workshop picture layer and applied the Filter>Distort>Displacement action, I'd add the distortion to the entire layer. If the level of distortion is big, it's going to seriously mess with both the edges AND the legibility of the subject. So, to control this:
- Make a quick, approximate selection inside the edges of your target picture (in this case it's the workshop).
- Feather your rectilinear selection by about 100 pixels so that the difference between what's distorted and what remains untouched is less obvious.
- Invert the selection so that your filter action affects the outer parts of the frame, not the inside.
- Apply the filter (Filter>Distort>Displacement). CS 'asks' for an image to work with. In this example it MUST be a Photoshop file, NOT a JPEG. So just point it to any .psd file lying around and see what happens. If it looks OK but is not quite enough, press Ctrl + F to repeat the last filter action - you get double the filter effect.
Press Ctrl + F again for still more displacement.


Tip: Once you've completed a few displacements, you might like to save specific .psd files for use in other displacement filter actions (like a special filter library to use whenever displacement maps are needed so you don't have to go hunting for a .psd file that works).
- You can also flip the .psd file 180 degrees to get a different displacement effect. Sometimes the combination of two displacement filter actions, from the same, but flipped, image, produces a better-looking edge distortion effect.


Note that because this is a pixel-based action, you can only make a displacement work on a text layer if that layer is first turned into pixels (i.e. rasterised) first. Do this by right-clicking the appropriate layer and choosing 'Rasterise'. In Elements this process is the same but it's called Simplifying...

Saturday 2 January 2010

Light Painting a Landscape


In this example I used a combination of added speedlight flash and flashlight - because the scene, this hillside, is so big.

We set the tripods and cameras up on one side of this little stream (you can't see the water as it is so dark!) then secreted a couple of assistants behind two of the largest rocks, top left, 'armed' with two Canon 530EX II speedlights apiece. While some of the workshop group collectively fired off the shutters (in Bulb mode) the remainder illuminated different parts of the scene with a range of torches (flash lights).
It's important to keep the torches moving all the time to prevent hot spots in the frame (see a test shot below). We snapped about ten different frames with varying degrees of success. All in almost total darkness. At the time, everything looked really good on the LCD screens.

So, once I got the frames back home and on to a large monitor, the results seemed a bit less than impressive. Problem with lighting a huge area like this is that you nearly always miss spots unless the event is orchestrated like a fee-paying advertising shoot. Which this wasn't. So I decided to fix the images using Photoshop. The key to this is in having a bunch of shots taken from the same position. As everything was shot using a tripod, every frame sat nicely in register.

So, I chose four of the best images - images with good spots of illumination but in different parts of the frame. It was then a relatively simple process to open all four, then copy and paste three into the fourth - to give a four-layered 'master' document.
What I did then was turn the top two layers OFF, and erased the bits on the third layer that were 'no good'.
I then turned on the third layer (thus totally obscuring the bottom layer and the' bits' of the second layer that I'd not erased) and erased all the rubbish bits off of that layer too.
I then turned the fourth, the top layer 'on' and erased the bits that didn't work off of that layer too.
The result should be a composite image with many more illumination effects and fewer black, non-illuminated spots. This will only work if your four images have complete registration with each other (i.e. they all line up) and if they have different illumination in different parts of the image (see seperate post on how this was done). No point in doing this if all layers have the same lighting because no amount of erasing is going to make the lighting look better if it is exactly the same underneath.


Friday 1 January 2010

Light Painting (exteriors with flash)


For those of you that love shooting after dark, here's another thing you can do when it seemingly becomes way too dark to even see by. Add your own light!
I know this might rankle with the 'principled' landscape shooter (who might prefer to use only 'what is', and never consider altering a scene in any way. But I don't care).
My philosophy is "If there ain't enough light, add some...". Best way to do that is to use the flash head on the camera. Even better, take the speedlight out of your camera bag, set the camera on a tripod, open the aperture to the max, set the shutter speed to expose for a long time and run around like a madman flashing the bits in the scene where there's not already enough light.
Sounds like fun? Is is but like all techniques, there are a few ground rules.
For example, you can only do this is in a relatively dark place, with a lens that is fully open. It's easier also to set your speedlight to Manual power output so you have more control over how much light to thump into the scene.
If you use a very small aperture you'd need a flashgun the size of a truck to make any difference. So, open the aperture and if that still does not work, increase the ISO rating from 100 to ISO 400 to help the exposure along.


In this example I put the camera on a tripod, the Canon EOS MkII to BULB (i.e. the shutter speed is set for as long as the shutter release cable is pressed), opened the aperture to f4, set the ISO to 400 and ran round the tree flashing upwards into the blanches. In a shot like this it's important to work fast and efficiently.
Also, to work to a plan, and in one direction, so you don't go over the same parts twice and create ugly hot spots.