Here's a short video from one of the many sumo bouts we watched on Monday at the Kokkusai Centre, Fukuoka.
Grand Sumo Championship, Fukuoka, Japan from Robin Nichols on Vimeo.
Thursday 14 November 2013
Benefits of a Lens Hood
I often get asked what that plastic 'thingo' on the front of a lens is for, and, when I explain, I get asked "should I use it".

To which I reply of course you should. Lens hoods are cheap plastic add-ons, often included in the cost of a lens. They provide a twofold benefit: Firstly a lens hood is a really effective lens element protector. I have tripped and fallen forward a couple of times and the lens hood took the brunt of the fall saving me from an expensive lens repair. It's happened to countless numbers of my students too. One example I remember where a student set up their tripod and then walked away to look at something. One leg on the tripod was not properly locked off so the rig collapsed and the lens went smack into the concrete floor - the lens hood was ruined but the lens itself was unharmed. Without the hood this would have been a very expensive repair!
Secondly, a lens hood shades the glass from extraneous light entering the lens and causing flare, image softness and poor quality - as you can see from the two shots here, the shaded version also appears darker and clearer.
 |
| Straight shot, no lens hood, no editing. |
 |
| With lens hood, no editing. Singing boatman in Yanagawa, a coastal town in Kyushu, Japan |
Tuesday 12 November 2013
Shooting the Sumo Tournament in Fukuoka
 |
| The Dohyo-iri ceremony signifies the start of a match - in this case the highest ranking maku-uchi. The silk woven kesho-mawashi aprons are used for such ceremonies and cost anything up to half a million yen. Sumo live in stables and get paid according to their ranking (between US$10,000 and 30,000 per month). Most sumo live a very strict existence but rarely live beyond 60-65 years because their lifestyle creates serious health problems. |
 |
| Enter the Maku-uchi or high grade sumo (based on the number of wins each season). Sumo ranking is judged on the number of wins in the dohyo (clay ring) and not, as some think, on weight. So one player could find themselves in the ring with another sumo twice their size. EOS 5D MkIII + 70-200mm + 1.4X Extender. ISO 800, 1/400s @ f4 |
 |
| Sumo pantomime by Natalie Hitchens. 50% of a sumo match is 300 years of tradition. Rituals take front stage in all matches, the referee (gyoji) changes each bout, the preamble is limited to a maximum of four minutes (it used to be unlimited so a match could take days or weeks!) and the salt sweepers (front at right) seem totally oblivious to the circus being performed around them. |
 |
| Salt thrower by Natalie Hitchens This guy was a master at pantomime, slapping his chest and thighs, shouting (rare in a sumo match) and flicking handfuls of salt high into the air. The salt is used symbolically for purifying the ring and for protecting the contestant from injury. Only the three top ranks of sumo are allowed the privilege of salt throwing. It worked because he won this bout easily. |
 |
| More bluster by Natalie Hitchens Foot stamping is as much about challenging the opponent as it might be about loosening those muscles |
 |
| The moment of truth by Natalie Hitchens. You can't get a shot like this without a fast shutter speed (1/1250s), high ISO (i.e. 2500+), continuous mode and a fast card. |
 |
| The Moment of Truth 2 by Natalie Hitchens Another sumo hits the clay. |
 |
| I loved capturing that moment when it seems all over. Balance and position would suggest that it's all over for the guy in blue. And it was. Once the foot touches any part outside of the dohyo, the bout is over. |
 |
| Looks like a head butt but it was just a push - big enough to get this ox of a sumo over the line. The loincloth worn by the sumo, called the mawashi, is made from silk and measures two foot high and 30 foot long! It gets folded in six and is then wrapped round the body four to seven times, depending on the girth of the sumo. There are supposed to be more than 70 winning tricks in sumo, most of which are achieved by maneuvering the opponent with a grip on the mawashi. |
 |
| My favourite sequence from the day. The result was so close that the five judges (gyoji) called for a rematch. Shooting multiple images in quick succession is the best way to capture that definitive shot, in this case the fourth from last (see below). |
 |
| Winning move? For many sumo might appear boring but once the highest ranking tacticians enter the dohyo things can get interesting. Here both contestants are aerial and headed out the ring. In the subsequent rematch the sumo on the left came out the winner. Another good reason not to pay a high price for a ring-side seat! |
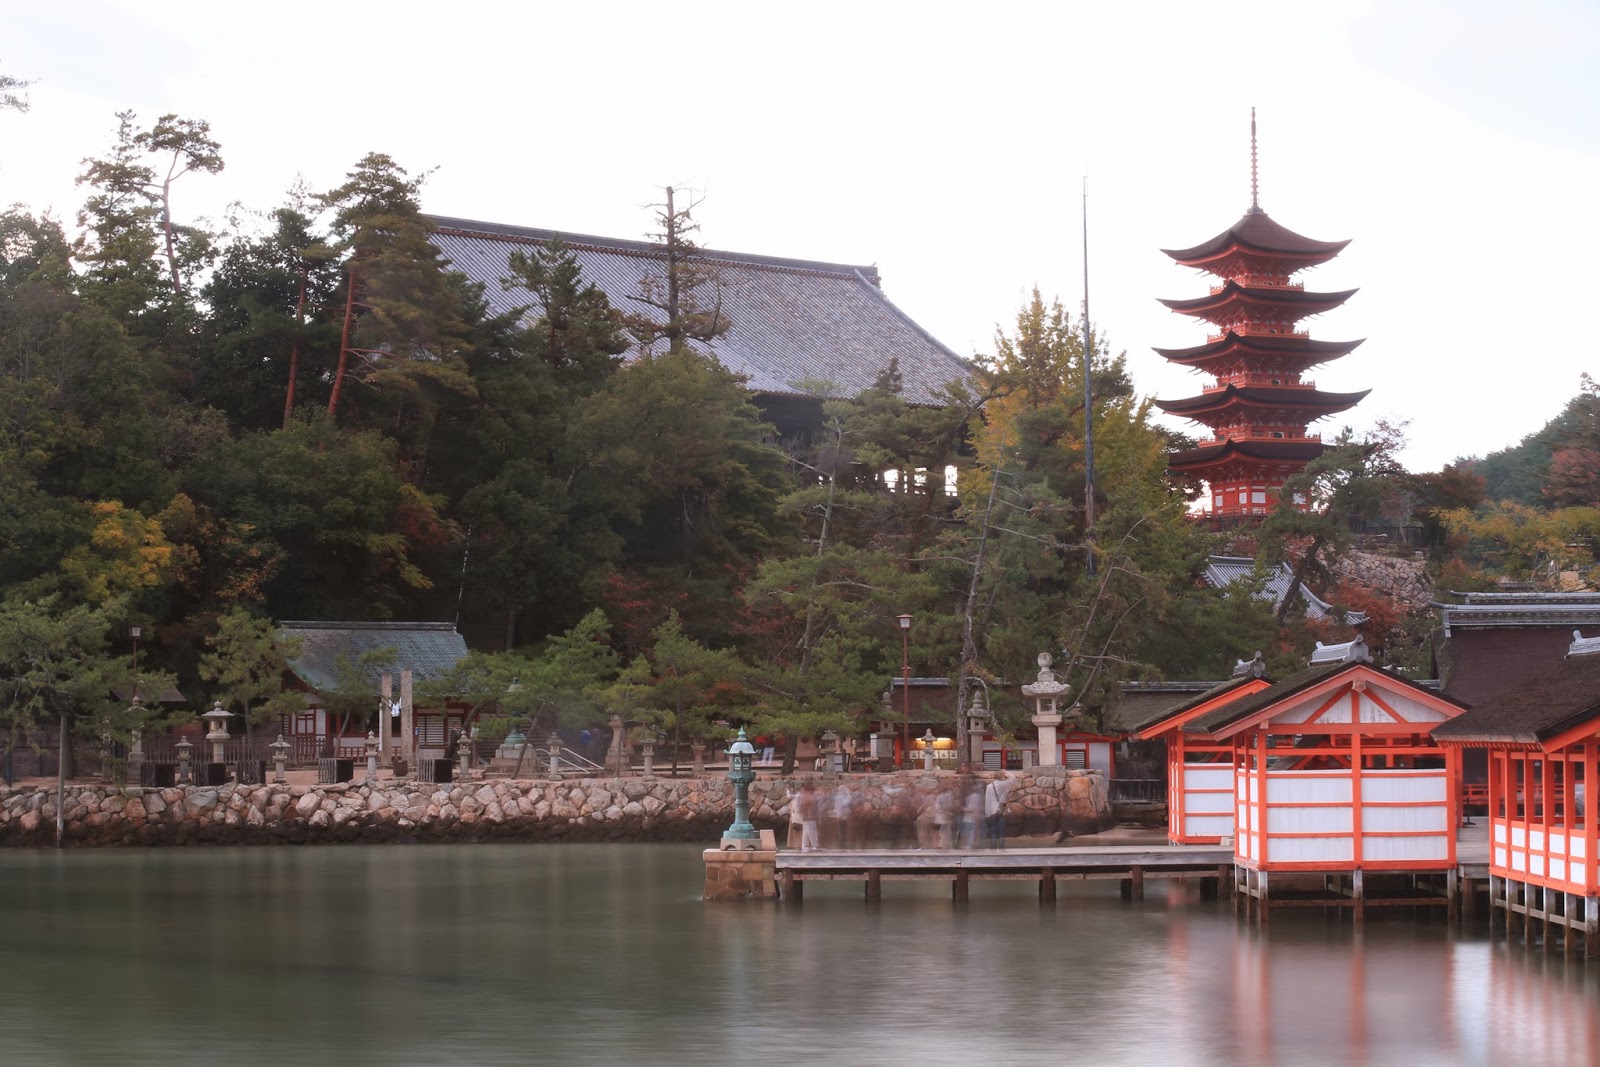
Night Photography, Miyajima Island, Japan
The watery shrine and famous 'floating' torii gate on Miyajima Island is on the list of Japan's "most beautiful spots" to visit (Japan has a lot of lists covering the 'most beautiful things..' available to see).
We arrived on the island by 4pm so set off with tripods to shoot the torii gate at high tide - actually, although this is a fabulous photo subject, the rest of the shrine, called Itsukushima, is also very interesting.
Photo Tip: to enhance the smoothness of any watery shots, shoot at f22 and the lowest ISO number available. The long shutter speed has the effect of smoothing out ripples and currents to give a glass-like surface.
To make this more effective, use a Neutral Density (ND) filter to extend the shutter speed. The result is a water surface that looks almost mirror-like, even though you can't see this with the naked eye. ND filters come in ND4, ND8, ND16 and ND64 strengths. I'd recommend an ND64 for bright light but an ND8 for evening shooting. An ND64 filter is almost opaque and reduces the exposure by a massive eight f-stops. Because of the long shutter speeds it is necessary to use a cable release or the self-timer.
Another benefit of using an ND filter is that, because of the extended shutter speeds it creates, people move through the frame and barely register - moving people almost disappear. With 20-30 second exposures movement barely registers so you end up with a virtually blank frame - you might get some ghosting if the people stand still for any length of time but otherwise, it's a good way to simplify a composition...
 |
| HDR of the Itsukushima Shrine, Miyajima Island |
Photo Tip: to enhance the smoothness of any watery shots, shoot at f22 and the lowest ISO number available. The long shutter speed has the effect of smoothing out ripples and currents to give a glass-like surface.
To make this more effective, use a Neutral Density (ND) filter to extend the shutter speed. The result is a water surface that looks almost mirror-like, even though you can't see this with the naked eye. ND filters come in ND4, ND8, ND16 and ND64 strengths. I'd recommend an ND64 for bright light but an ND8 for evening shooting. An ND64 filter is almost opaque and reduces the exposure by a massive eight f-stops. Because of the long shutter speeds it is necessary to use a cable release or the self-timer.
Another benefit of using an ND filter is that, because of the extended shutter speeds it creates, people move through the frame and barely register - moving people almost disappear. With 20-30 second exposures movement barely registers so you end up with a virtually blank frame - you might get some ghosting if the people stand still for any length of time but otherwise, it's a good way to simplify a composition...
 |
| HDR of Japan's most famous 'floating' torii gate off Miyajima Island, standing in three metres of sea water - with Miyajimaguchi on the mainland in the background. Here the HDR effect helps exaggerate the cloud formation. |
 |
| Daylight? No, this was shot at 7pm, well after sunset. Most of the illumination comes from the powerful spotlights along the shore to my immediate left. A long HDR exposure helped fill in some of the details in the darker wooded slopes in the background. |
 |
| Same view as above but slightly closer - note the flat sea and mirror-like surface created by forcing the shutter speed to extend as long as possible - in this case 30secs @f22. |
 |
| One of the many shrines that dot the island. HDR at dusk. |
 |
| Rear view of Itsukushima Shrine on Miyajima Island. Despite the long 20 second exposure I still got blurry figures under the arches slightly right of centre frame. |
 |
| Same place, but a slightly different take on the scene. Although the sky was heavily clouded and dramatic, the HDR process certainly helps add drama to this scene. |
Night Shooting in Kurashiki
Kurashiki is a small town on the main Osaka to Hakata rail line in Japan. Most would pass through the region, stopping briefly at Okayama before thundering off to Hiroshima and Hakata in Kyushu. The reason for stopping at Kurashiki, 20 mins by local train from Okayama is twofold. It's an almost perfectly preserved mill town, famous for its cotton production, plus it has one of the best art museums in the country featuring works from both Japan and Western cultures. The factory owners clearly spent their wealth well. Now it is a pleasant little town full of old wooden houses, brick warehouses (now converted into shops and a hotel) and several hundred metres of willow flanked canals that form the nucleus of this tourist town.

It's a very pretty location and makes for some great pictures in good weather. I had overcast skies so ended up shooting mostly in the early evening so I could ignore the bland skies and create something a little more interesting with very long exposures.
 Most of the shots here are HDR images, multiple exposures combined using Photomatix Pro to give a wide dynamic range look to the shots - vital when shooting in the light and dark extremes of night.
 |
| Yurinoso Villa, Kurashiki This was my favourite image - mostly because there were no hotspots (created by artificial lighting) which produced a more even tonality in the scene. The HDR effect produces an image that looks more like a film set than a night scene at a tourist spot. |
 |
| Canal, Kurashiki town. Extremely long shutter speeds are great for producing a mirror-like sheen on the surface of water. |
 |
| Gateway to old wooden residence, Kurashiki |
 |
| Tourist information centre lit up at night in Kurashiki's historical Bikan quarter |
 |
| A classic Japanese bridge built over the canal - originally used to ship goods and spun cotton to other parts of Japan in the Meiji period, it's now a big tourist attraction. HDR, five frames processed using Photomatix Pro and Photoshop. |
Monday 11 November 2013
Image Stabilisation and Clarity
How often do you consider turning your image stabilisation function off to get better image clarity?
Most would answer "never", and to be honest I have always been a bit skeptical of its benefit. I have read that you should always turn the image stabilisation off when the camera is tripod mounted but have never seen any evidence to prove it worth the effort. However, I was recently shooting landscapes on a tripod using extended shutter speeds (to get a nice smooth-looking sea surface) and could not get a sharp result. I tried one test frame with the IS off and noticed a marked improvement in the clarity of the file.
Most would answer "never", and to be honest I have always been a bit skeptical of its benefit. I have read that you should always turn the image stabilisation off when the camera is tripod mounted but have never seen any evidence to prove it worth the effort. However, I was recently shooting landscapes on a tripod using extended shutter speeds (to get a nice smooth-looking sea surface) and could not get a sharp result. I tried one test frame with the IS off and noticed a marked improvement in the clarity of the file.
 |
| Itsukushima shrine Canon EOS 5D MkIII +EF70-200mm f2.8 USM II lens, 30 secs @ F32, ISO 100 with the lens stabilisation turned On. The resulting file is noticeably spongy... |
 |
| Exactly the same exposure and treatment - but with the IS turned off. You can see a huge improvement in image clarity. Though this was a one-off experiment, the ONLY files that were sharp were the ones without the image stabilisation ON. From now on, all my tripod work will be shot without the benefit of stabilisation... |
Sunday 10 November 2013
GoPro for Grown-ups
Here's a very short video I made with my GoPro camera in Japan. It's made from a few clips I shot on a walk up to the Kiyuomizu-dera shrine in Kyoto and was hurredly put together using Adobe Premiere Pro while on the train between Kyoto and Okayama (so I only had 50 minutes to finish it off!). Hopefully it demonstrates how you can create a simple travel video - but with different angles and fields of view. GoPros are small, discrete and waterproof - allowing you to manhandle them easily into places you'd never risk putting an expensive DSLR camera.
GoPro for Grown Ups is the title of an upcoming class I will be holding in Sydney, and online, next year. Basically it's all about how to make cool little videos with totally different 'looks' using a GoPro camera...
GoPro for Grown Ups is the title of an upcoming class I will be holding in Sydney, and online, next year. Basically it's all about how to make cool little videos with totally different 'looks' using a GoPro camera...
GoPro for GrownUps #1 from Robin Nichols on Vimeo.
Shooting in Nishiki Markets
 |
| The people working in Nishiki markets |
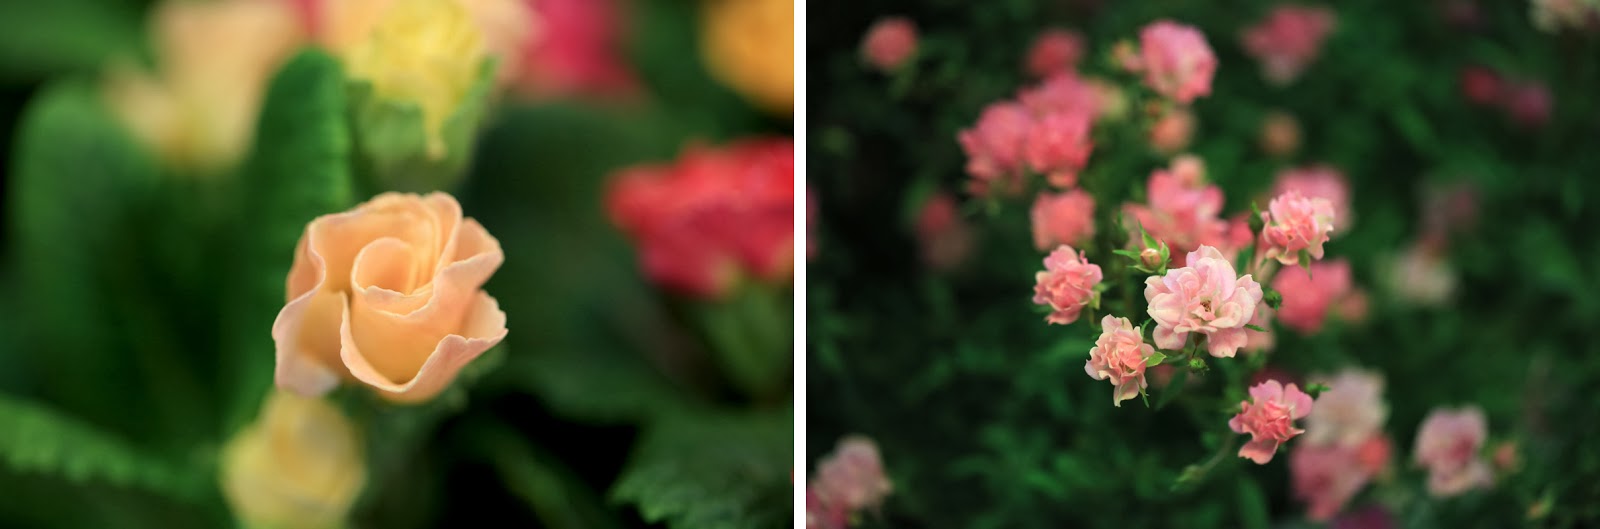 |
| Nishiki markets in Kyoto are a great place to see a range of 'real' Japanese produce, food, flowers and dry goods that you'd not normally see walking the streets. But it's a busy place so one of the best ways to capture the place is to go close. In this case using a 100mm MACRO lens to fill the frame and to de-focus the often busy background. All pictures by Natalie Hitchens. |


Friday 8 November 2013
Kasuga Shrine, Nara, Kyoto
 |
| Spent the day in Nara, the original capital city of Japan (dating back to 768AD) One of my biggest issues when shooting in typical Japanese shrines is their dark colour. Most of Kyoto's ancient shrines are constructed from very dark timber timber so unless the lighting is perfect, all you get is a black outline with negligible shadow detail. One way to deal with this is to shoot HDR - three frames and process using Photomatix Pro or a similar HDR processing software. Another solution is to fill the frame with colour wherever possible. |
 |
| In this shot of stone lamps leading up to the Kasuga Taisho, I tried to add slightly more visual impact by vignetting the part of the picture that was sharp (shot at f2.8) then brightening the inside of the vignette and darkening the outside. Some care is needed not to overdo the result. I usually also add a softening blur to the outer part of the selection then a (USM) sharpening filter to the inside to further bring out the detail in the vignette. |

 |
| There are loads of deer roaming wild in the park. All appear very well fed, by the tourists of course, who can purchase deer food (a type of biscuit) to give to the unsuspecting ungulates. They make cute subjects among the stone lanterns. |
 |
| Shooting close up details is another technique to use when trying to get away from either too many dark wooden structures or pictures that are far too busy with detail. Less is usually always more (or better) because then picture construction becomes simpler... |


Thursday 7 November 2013
Japanese Woodblock Printing
| Fushimi Inari Taisha shrine is one of my favourite spots to visit in Kyoto. Inari is the god of rice but the temple is frequented by merchants and businesses who erect torii gates dedicated to prosperity. The shrine has thousands of torii gates stretching along 14km of walking trails round the mountain. You can also see many statues of foxes in the complex. Foxes are regarded as being messengers - some statues even carry the key to the granary in their mouths. |
| For a different 'look' in these pictures, I processed the RAW files first, then added a Japanese woodblock effect using a very cool software app called Moku Hanga from Jixi Pix. (Moku Hanga means woodblock in Japanese). |

Subscribe to:
Posts (Atom)