Blend Modes is a feature that's notoriously hard to describe in words. Not because it's boring or ineffective but because each Blend Mode (and there are lots) produces a totally different reaction with each image it is used on. Well, that's my excuse as a writer anyhow...
There are two ways to access a Blend Mode: through the regular Photoshop or Elements tool options bar (that's if the tool you are using HAS a Blend Mode capability) or on a duplicated layer (note that a straight shot is effectively a one-layer image. A layer Blend Mode needs to interact with the pixels on the layer beneath - so you can only work with Blend Modes on a duplicated layer.
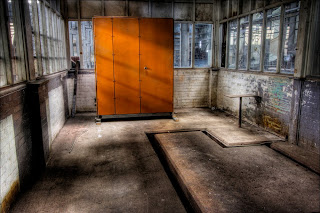
In this example I want to 'pep up' the shot of a disused workshop by adding texture.
1: I opened the master image (the peeling paint shot).
2: I opened the workshop picture, selected it all then copied it then pasted it into the master document.
3: Step three was to resize the pasted layer so it formed a smaller image on the page (using the layer Transformation command - Ctrl + T).
4: Once resized it looked fairly normal, boring even, so I copied the base image (peeling paint) and pasted it back into the same master document to give me two peeling paint shots and one of the workshop. If the latter is not in the middle of the layer stack (check the layer palette) drag the appropriate layer to the right position.
5: To make this work, make sure that the top (peeling paint) layer is active (click it once to do this). Then change its Blend Mode from Normal to Soft Light, Overlay or maybe Hard Light.

No comments:
Post a Comment